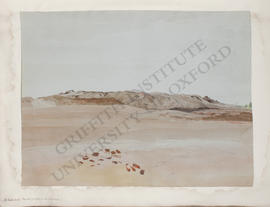
Tell el-Balamūn. Carnarvon-Carter excavations: sketch map of site
Add to clipboard
Tell el-Balamūn. Carnarvon-Carter excavations: sketch map of site
Tell el-Balamūn. Girdle Wall. Carnarvon-Carter excavations: photographs of part of girdle wall and a Greek vessel
Add to clipboard
Tell el-Balamūn. Girdle Wall. Carnarvon-Carter excavations: photographs of part of girdle wall and a Greek vessel
Tell el-Balamūn. Great Enclosure wall. Carnarvon-Carter excavations: photographs of trench no. 5
Add to clipboard
Tell el-Balamūn. Great Enclosure wall. Carnarvon-Carter excavations: photographs of trench no. 5
Tell el-Balamūn. Great Enclosure wall. Carnarvon-Carter excavations: photographs of trenches 5 and 6
Add to clipboard
Tell el-Balamūn. Great Enclosure wall. Carnarvon-Carter excavations: photographs of trenches 5 and 6
Tell el-Balamūn. Palace. Carnarvon-Carter excavations: photographs of trench no. 7 and pottery with hieratic text
Add to clipboard
Tell el-Balamūn. Palace. Carnarvon-Carter excavations: photographs of trench no. 7 and pottery with hieratic text
Tell el-Balamūn. Temple and Palace area. Carnarvon-Carter excavations: photograph, stone hammers
Add to clipboard
Tell el-Balamūn. Temple and Palace area. Carnarvon-Carter excavations: photograph, stone hammers
Tell el-Balamūn. Temple and Palace area. Carnarvon-Carter excavations: photographs of finds, scarabs and weights
Add to clipboard
Tell el-Balamūn. Temple and Palace area. Carnarvon-Carter excavations: photographs of finds, scarabs and weights
Tell el-Balamūn. Temple and Palace area. Carnarvon-Carter excavations: photographs, duplicates
Add to clipboard
Tell el-Balamūn. Temple and Palace area. Carnarvon-Carter excavations: photographs, duplicates
Tell el-Balamūn. Temple and Palace area. Central Approach. Carnarvon-Carter excavations: photograph, trench no. 5 finds
Add to clipboard
Tell el-Balamūn. Temple and Palace area. Central Approach. Carnarvon-Carter excavations: photograph, trench no. 5 finds
Tell el-Balamūn. Temple and Palace area. Central Approach. Carnarvon-Carter excavations: photograph, vessels
Add to clipboard
Tell el-Balamūn. Temple and Palace area. Central Approach. Carnarvon-Carter excavations: photograph, vessels
Tell el-Balamūn. Temple and Palace area. Central Approach. Carnarvon-Carter excavations: photographs, finds from trench no. 2 finds and other parts of site
Add to clipboard
Tell el-Balamūn. Temple and Palace area. Central Approach. Carnarvon-Carter excavations: photographs, finds from trench no. 2 finds and other parts of site
Tell el-Balamūn. Temple and Palace area. Central Approach. Carnarvon-Carter excavations: photographs, general view of trenches nos. 1-4
Add to clipboard
Tell el-Balamūn. Temple and Palace area. Central Approach. Carnarvon-Carter excavations: photographs, general view of trenches nos. 1-4
Tell el-Balamūn. Temple and Palace area. Central Approach. Carnarvon-Carter excavations: photographs, trench no. 1
Add to clipboard
Tell el-Balamūn. Temple and Palace area. Central Approach. Carnarvon-Carter excavations: photographs, trench no. 1
Tell el-Balamūn. Temple and Palace area. Central Approach. Carnarvon-Carter excavations: photographs, trench no. 2
Add to clipboard
Tell el-Balamūn. Temple and Palace area. Central Approach. Carnarvon-Carter excavations: photographs, trench no. 2
Tell el-Balamūn. Temple and Palace area. Central Approach. Carnarvon-Carter excavations: photographs, trench no. 3
Add to clipboard
Tell el-Balamūn. Temple and Palace area. Central Approach. Carnarvon-Carter excavations: photographs, trench no. 3
Tell el-Balamūn. Temple and Palace area. Central Approach. Carnarvon-Carter excavations: photographs, trench no. 3, finds
Add to clipboard
Tell el-Balamūn. Temple and Palace area. Central Approach. Carnarvon-Carter excavations: photographs, trench no. 3, finds
Tell el-Balamūn. Temple and Palace area. Central Approach. Carnarvon-Carter excavations: photographs, trenches nos. 1 and 3a finds
Add to clipboard
Tell el-Balamūn. Temple and Palace area. Central Approach. Carnarvon-Carter excavations: photographs, trenches nos. 1 and 3a finds
Tell el-Balamūn. Temple and Palace area. Central Approach. Carnarvon-Carter excavations: photographs, trenches nos. 3 and 5 finds
Add to clipboard
Tell el-Balamūn. Temple and Palace area. Central Approach. Carnarvon-Carter excavations: photographs, trenches nos. 3 and 5 finds
Tell el-Balamūn. Temple and Palace area. Central Approach. Carnarvon-Carter excavations: photographs, trenches nos. 3, 3a, 3b and 5 finds
Add to clipboard
Tell el-Balamūn. Temple and Palace area. Central Approach. Carnarvon-Carter excavations: photographs, trenches nos. 3, 3a, 3b and 5 finds
Tell el-Balamūn. Temple. Carnarvon-Carter excavations: photographs of, and from temple site
Add to clipboard
Tell el-Balamūn. Temple. Carnarvon-Carter excavations: photographs of, and from temple site
Tell el-Balamūn. Temple. Carnarvon-Carter excavations: photographs, inscribed temple block
Add to clipboard
Tell el-Balamūn. Temple. Carnarvon-Carter excavations: photographs, inscribed temple block
Add to clipboard
Tell el-Farama (Pelusium), a fallen column
Add to clipboard
Tell el-Farama (Pelusium), four fallen columns
Add to clipboard
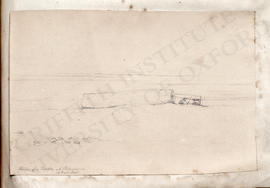
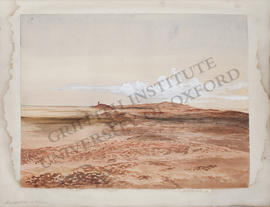
Tell el-Farama (Pelusium), ruins
Add to clipboard
Tell el-Farama (Pelusium), ruins
Add to clipboard
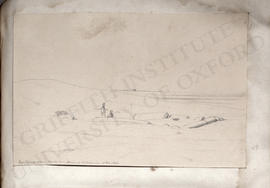
Tell el-Farama (Pelusium), ruins of the citadel
Add to clipboard
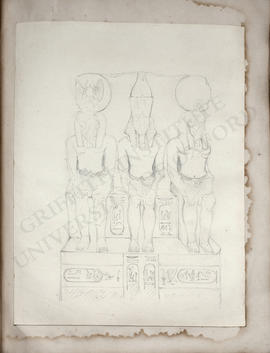
Tell el-Maskhuta (Pithom), Temple, monolithic statue-group of Ramesses II between Re and Atum
Add to clipboard
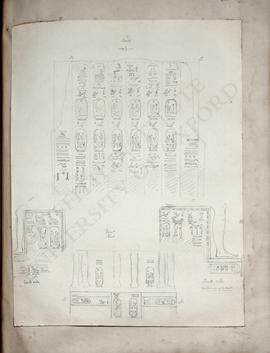
Tell el-Maskhuta (Pithom), Temple, monolithic statue-group of Ramesses II between Re and Atum, inscriptions
Add to clipboard
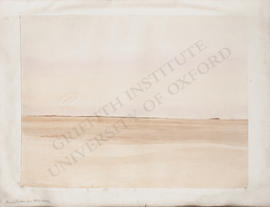
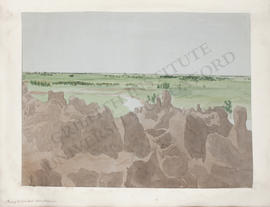
Tell el-Yahudiya (Leontopolis), view from within the ruins
Add to clipboard
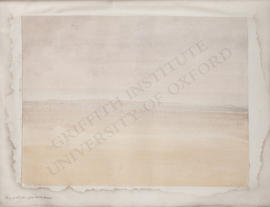
Tell el-Yahudiya (Leontopolis), view of the ruins